 |
Upper bushes for Soarer front and rear wheels |
|
Upper bushes for Soarer front and rear wheels |
by Peter Scott
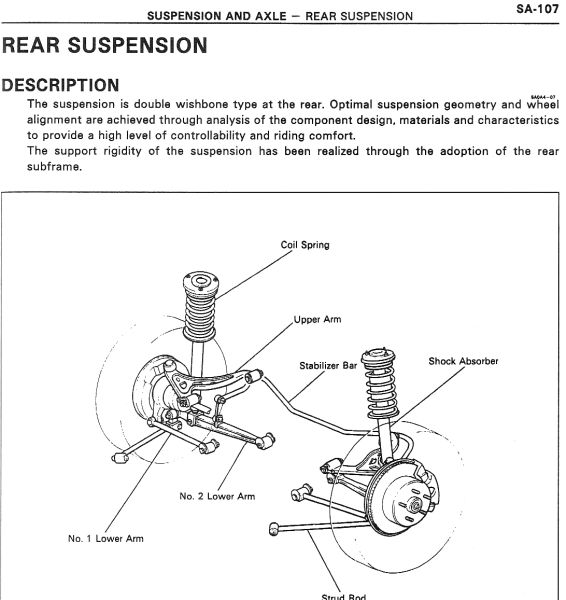
Well he has done it again! Andrew Vlamos (email vlamos@bigpond.net.au or phone mobile 0411 227 007) Mr Perfectionist, has gone and manufactured upper control arm bushes for the front and rear wheels of the Toyota Soarer and Lexus SC Coupes. Now we can get superb quality bushes to match the Lower Bushes he is already famous for.
When mine arrived in the mail again I had to admire them for the works of art that they are. So much cheaper to replace the bushes like this rather than buy a new control arm from Toyota. These are the only bushes that will give your Soarer that brand new feeling again.
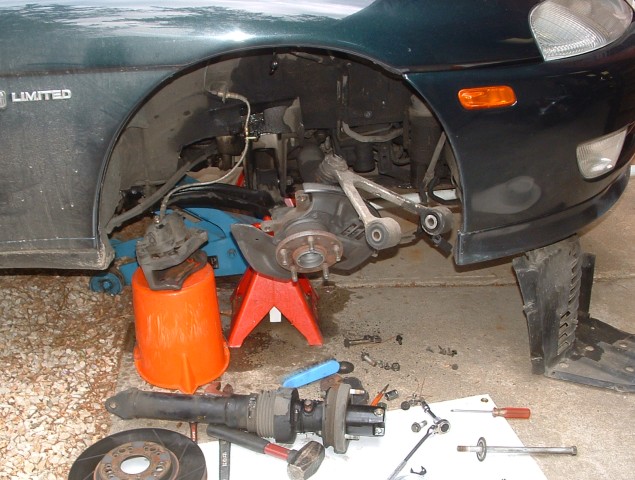
That V-shaped aluminium piece - that's the upper control arm. The rubber bushes are
clamped tight - no moving parts - the rubber actually twists, stretches, every time you go
over a bump- that's why it's important to have the suspension at normal ride level
before tightening up the bolts. Every car manufacturer makes rubber bushes this way -
gives the best ride and reduces noise, vibration and harshness (NVH).
The plastic shroud at the front has to be removed so that the long bolt can be slid out.
The 19mm nut is the tightest nut I think I have ever come across!! I used the Metrinch
wall drive ring spanner, hooked another on the end of that and strained until my head
nearly exploded! - no good. So out comes the mini sledge, more work and it was
finally done.
Don't have to remove the brakes. I was getting my slotted rotors skimmed - that's why I
took mine off. The orange bucket is jus the right size to support the caliper without
straining the stainless steel
brake hoses. That shock on the ground is an Active UZZ32 strut. Oil is pumped to it to control height - sensors
keep the car level during braking and cornering - no springs or swaybars or airbags on my
car. I didn't have to remove it - but since I'm in there might as well rebuild it with a
Toyota seal and bronze guide kit. The oil every where is from the strut - bit messy.
I wouldn't recommend this as a DIY at all. You need special tools to separate the ball
joint - last thing you want is to stuff the boot or something like that. Then you
also need a whopping big press to install the bushes. Best to take it to a suspension
place to get the bushes installed professionally. Let's face it, you deserve it!
Emanuel Spinola has had them fitted to his car:
Andrew
Got them fitted successfully today. Pedders complained that it was a real pain to do the rears and that they won't be underquoting anyone else like they did for me ($320 front and rears with wheel alignment). :-)
They said the old bushes, whilst not completely stuffed, were very much on their way to being useless, especially the rears.
Ride is better now - not as harsh on really rough patches of road/potholes etc. Feels solid around fast corners - I'll give it a real workout this Saturday and see how it behaves at full tilt.
A wheel alignment usually cost around $75 on it's own. You may get away without an alignment since technically the geometry won't change when only doing the uppers.
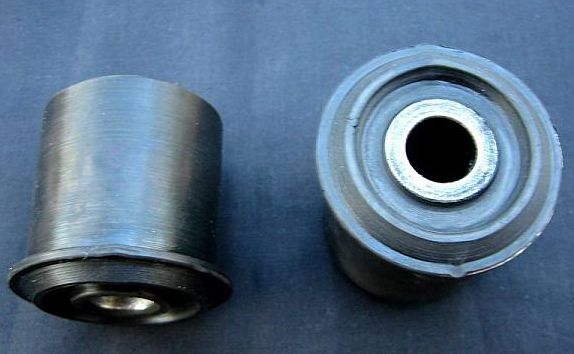
These are the upper bushes that go towards the front of the car.
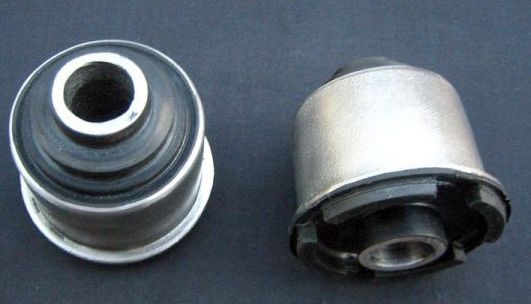
And these are the ones that go towards the rear of the car.

The upper A arms have front and rear bushes. Like the lower arms it's the rear bushes that get all the punishment and deteriorate first.
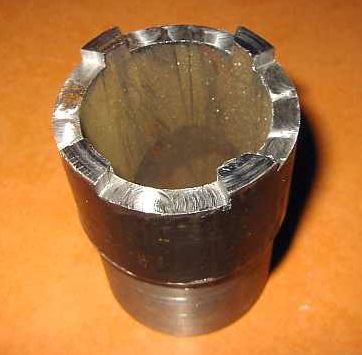
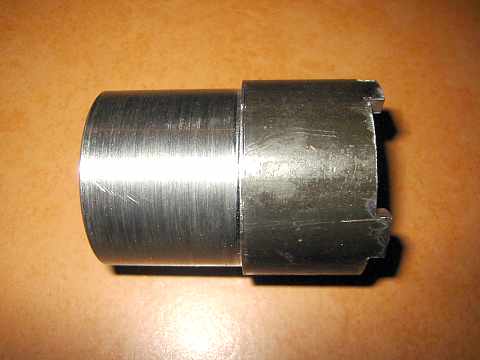
Andrew has also made this tool to remove the bushes - of course it's a model of the genuine Toyota Tool!

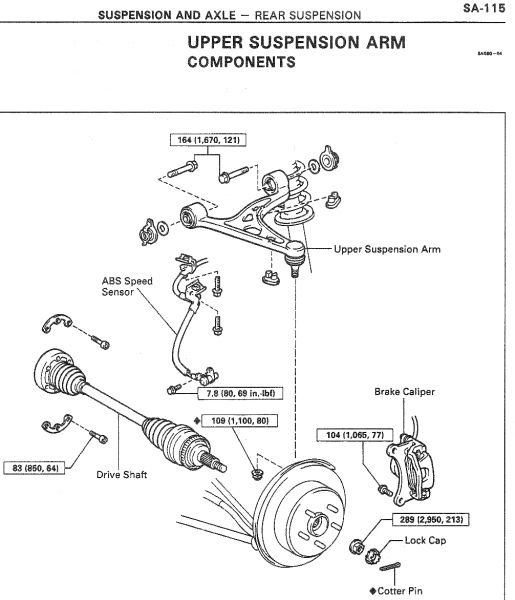
But wait there's more! The bushes also fit the rear upper arms on the rear wheels!
Andrew also includes intructions on how to install the bushes:
Soarer SC 300 / 400 Upper Front Control Arm
Fitting Instructions
Important : Fitting Instructions
Once you have removed the worn bushes thoroughly clean all dirt from bush housings prior to fitting the new bushes.
Warning :
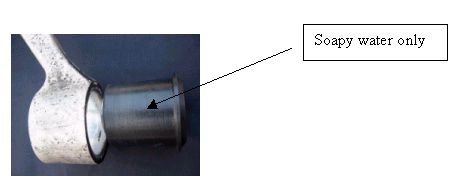
Do Not Use any lubricants such as (wd 40, silicone spray, rubber grease or similar) to fit the new bushes into arms.
Use only – Soapy water
If you do not have access to a press you can press in the new bushes using a large bench vice making sure the bushes are pressed in square to the housing, using only soapy water as it is important the bushes dry out after fitting (must be completely dry and free of any lubricants)
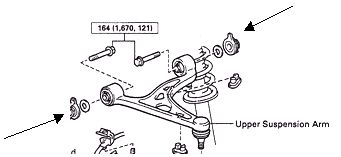
Torque settings : Ft lbs 121 : Nm (164)
Upper Front Control Arm & Bush
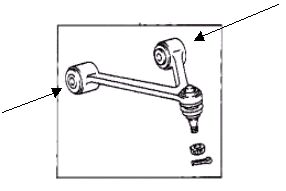
Arrows indicate the fitting position of the upper front bushes.
"Warning: Please ensure that these bushes are installed by competent trade persons"
The pics referred to in the above instructions are emailed to the end user . For a copy contact : vlamos @ bigpond.net.au
Soarer SC 300 / 400 Upper Rear Control Arm
Fitting Instructions
Important : Fitting Instructions
Once you have removed the worn bushes thoroughly clean all the housing thoroughly prior to fitting the new bushes.
1) Please note the arrows indicate the fitting position of the bushes in relation to the arms refer
2) New bushes must be pressed in not hammered in.
"Warning: Please ensure that these bushes are installed by competent trade persons"
The pics referred to in the above instructions are emailed to the end user . For a copy contact : vlamos @ bigpond.net.au