 |
Steering Rack Bushes and new car feel. |
 |
|
Steering Rack Bushes and new car feel. |
|
by Peter Scott
Fitting new Vlamos Steering rack bushes to my Soarer made a big improvement.
Same old story. I didn't think my steering rack bushes would ever need replacing. It wouldn't happen to me. I had a few niggles with the steering. Nothing major I thought. Reversing out the driveway I would sometimes feel a jolt through the steering wheel. Sometimes when braking I would feel a judder through the wheel - little things like that. It didn't get any better - it got worse. I guess it crept up on me. Andrew Vlamos reckoned the steering rack bushes are shagged on every Soarer by now.
Anyway, finally I decided to have a go at changing them. I guess changing out a power steering rack in a BMW several times (no - no planetBMW coming up) gave me the courage to tackle a simple bush change on my Soarer.
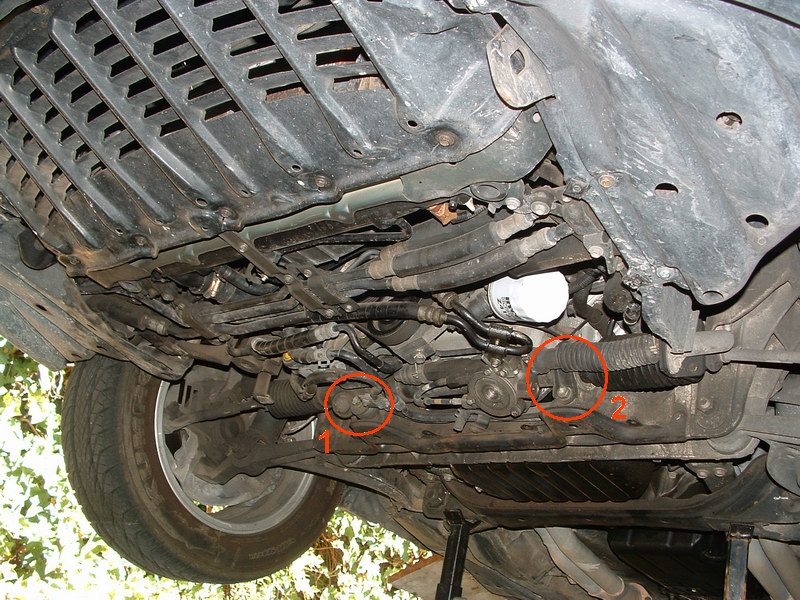
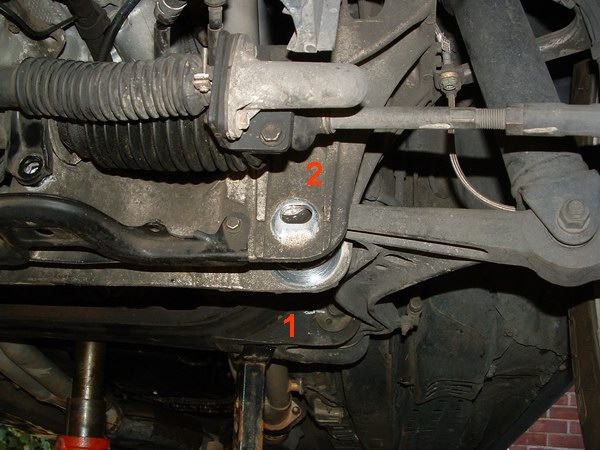
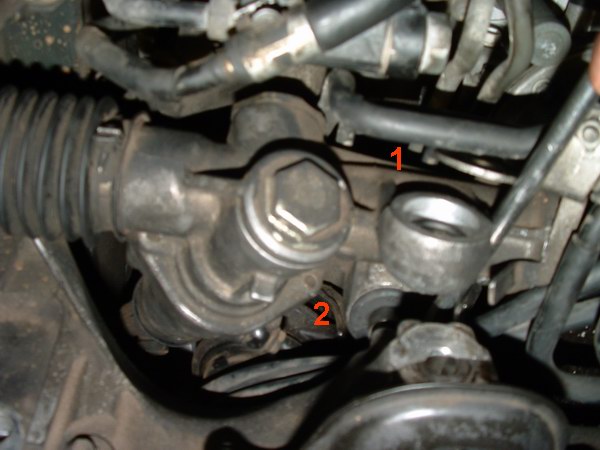
1. The steering wheel side of the car is where the action is. Two bushes, one in front
circled and another hidden on top are the ones that get old, shrink and allow the wiggles.
2. The passenger side is clamped - This part is available from Toyota - nothing to do here
except remove the two bolts to allow the rack to move about to fit the bushes on the other
side. The clamped bit seemed ok on my car so I left it as is.
My car has the fancy pants 4 wheel steer rack - so if it looks a lot different to yours
that's why. That round thing at the front with the two cables coming out connects to the
rear rack. Below is a pic of a regular steering rack:
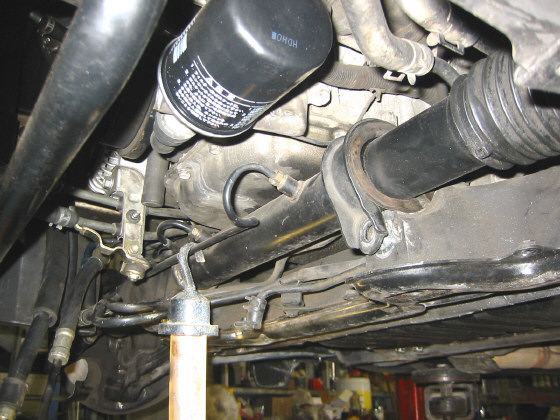
Doesn't a regular steering rack look plain compared to the 4ws rack?
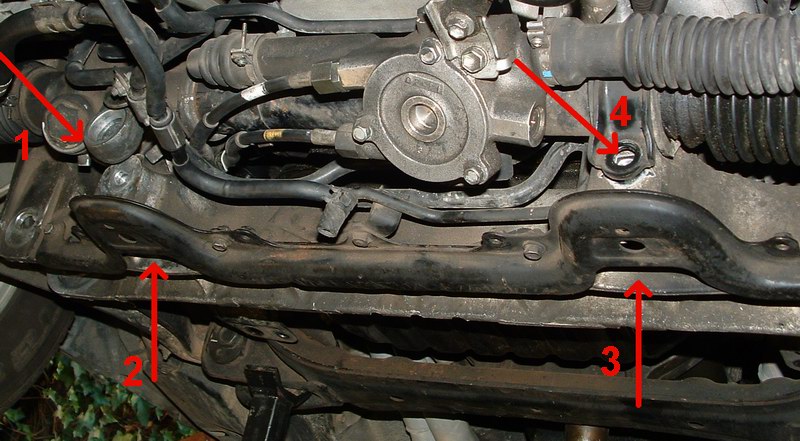
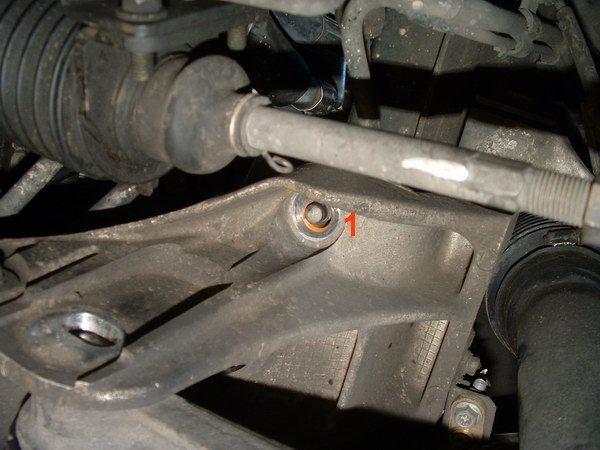
1. First bolt holding the front bush was a doddle.
2. Second bolt holding the hidden top bush was the hard one for me - I couldn't get near
it with my fat fingers - the bolt was ok - it was the nut hidden up top that was the hard
bit.
3 and 4 were easy peasy.
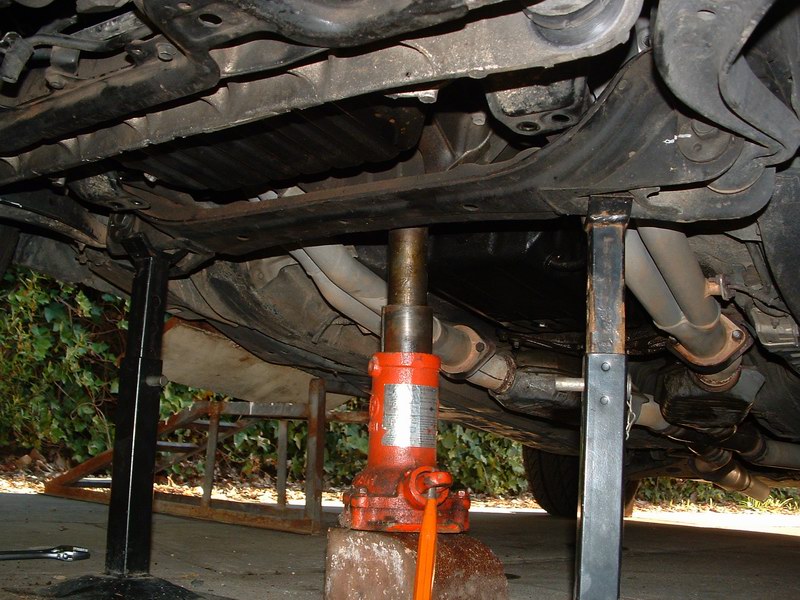
I like a stand up fight. No wiggling fussy fingertip fancy work for me. I couldn't see the top bush on my steering rack - let alone remove a bush and squeeze in another. So I decided to lower the aluminum sub frame to give me some work room. A few simple bolts and I had lowered the cross member enough to complete the job. First thing was to jack the transmission bell housing - just enough to take the weight from the cross member. I also used my flimsy car stands (my big nice ones were holding the German Camira off the ground!) and my wheel ramps under the car just in case. I mean I don't want to die with a Soarer squashing my guts out. If I die with my Soarer before I get buried in it, then it will be in a ball of fire at 240 kph, not quietly crushing me on the concrete driveway!- how embarrassing would that be!

1. I didn't have to remove the bolt for the rear lower control arm bush. But I wanted
to check it so paint marks allow me to reinstall it and keep wheel alignment correct.
2. I could probably have got away without removing the front lower control arm bush bolt
too - but the weight of the wheel tends to push the cross member up - when I wanted it to
come down a bit - and I didn't want any mucking about so out came that bolt. Again paint
marks let me put it back together right.
3. I removed these two bolts on each side too.
1. Paint marks on the rear lower control arm bush - again this one really didn't need
to be removed.
2. Bolt removed from the front lower control arm bush.
1. Four bolts like this one hold the cross member to the subframe. The subframe ain't
going to come crashing down or anything.
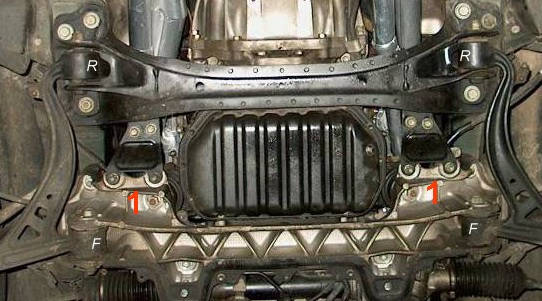
1. Bottom of the engine mount nuts. I also removed these so the cross member could be lowered from the engine.
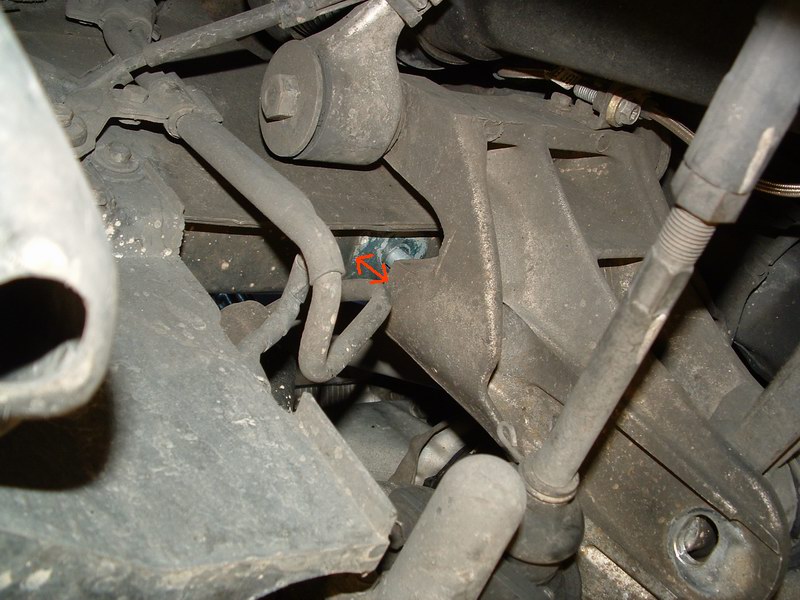
Once the nuts on the engine mount were removed I was able to wiggle the cross member this much (see arrow) from the subframe. The engine mounts stayed bolted to the engine - and the jack under the transmission tunnel held the engine up. This space was now enough for me to get at the top steering rack bush. It was fair game for me now.
1. The front bush is the easy one to get. Mine pressed out easily - too easily. That's
probably an indication they were knackered. The new ones were much tighter to fit.
2. The top bush is a bugga to get to.
Removing the old bushes wasn't very hard - I just pressed them out with a screwdriver intact in one piece. The Vlamos new steering rack bushes were in two parts. For the front bush it was simply insert the two rubber halves, then press in the metal centre tube. I had to be careful when doing up the bolt that it the rubber didn't kink and went in smoothly.
The top bush was a bit trickier. I got the rubber halves in ok- then I put the metal inner cylinder in from the bottom - got it in enough to get the bolt in and squash it in the rest of the way. Again I had to make sure the rubber bits went in square.
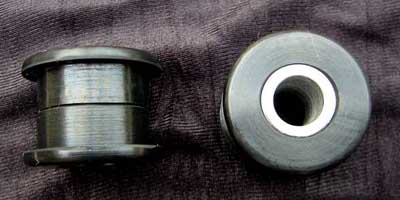
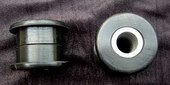
These are the new bushes from Andrew Vlamos. He also has fitting instructions available. Andrew can fit them without touching the cross member! So there are two methods - the cross member leave alone method and the get the bloody cross member out the way method!

When I got these old bushes out the first thing I thought was that I had wasted my time. They looked just fine. Sure they were a bit easy to take out - maybe that meant they were worn. But I wasn't convinced. I fitted the new ones but I was doubtful it would make any difference to my car - boy was I wrong about that!
So after a couple of hours the car was ready to go again and I reversed out the driveway. Nothing. Not a clunk, not a jolt, not a judder, not a squeak, nuttin' but gorgeousness.
I was so happy that all nastiness through the wheel had gone. How on Earth could two little new rubber bushes make such a difference? I was very suprised and very happy.
10 outta 10 Mr Vlamos you've done it again.
cheers
Peter Scott
Steering Rack Bush Site with prices - he sends them around the world.
Steering Rack Bush fitting instructions - need Adobe to read the pdf file.
I also fitted the lower control arm bushes available from Andrew.