 |
V8 Timing Belt Change, and serpentine belt. |
|
V8 Timing Belt Change, and serpentine belt. |
by Peter Scott
150 000 km rolled around so it was time to change the timing belt. Toyota recommend changing it every 160 000 km or 100 000 miles.
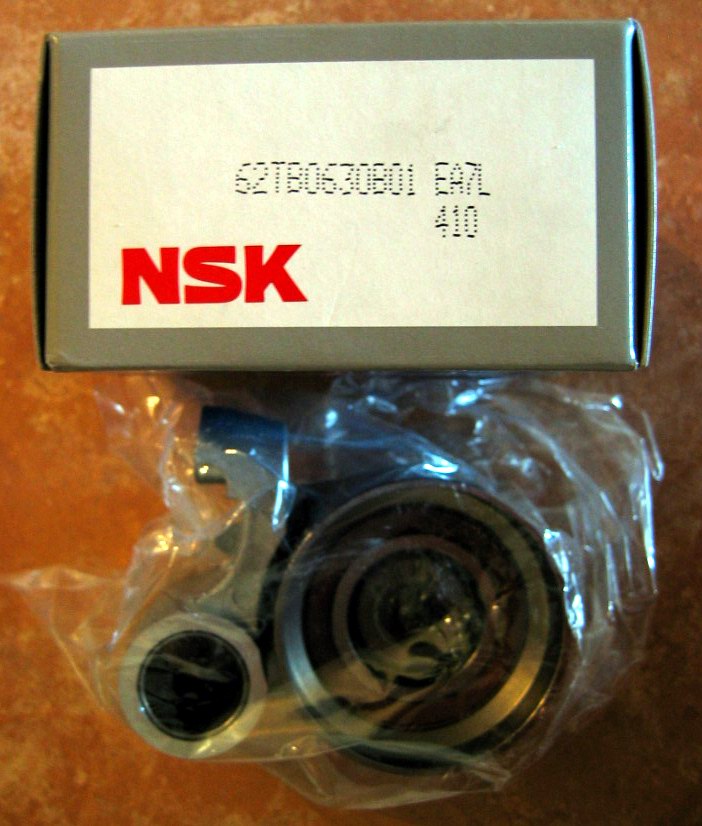
For all the bearings I ring a bearing company (CBC in my case) and they have all the right parts and the numbers and are cheaper than Toyota.
For the Timing Belt, water pump and other Toyota parts I ring James Sloane from Castle Hill Toyota, NSW Australia. He gets me the best price and posts them to me overnight - even though I'm a 1000 miles away I find it cheaper and more convenient using him than driving to the local Toyota place. He'll give you the best price too, just ring 1800 111 388, ask for spare parts, ask for James, tell him that planetsoarer said he would give the best price and away you go. Top service.
For the caps and rotors I just looked up a LS400 1UZ-FE in the Bosch catalog and ordered them - also cheaper than genuine Toyota.
Estimated Parts cost:
Water Pump $155 (get some gasket goo in a tube - doesn't come with a
gasket)
Cam Belt $66 (Toyota only)
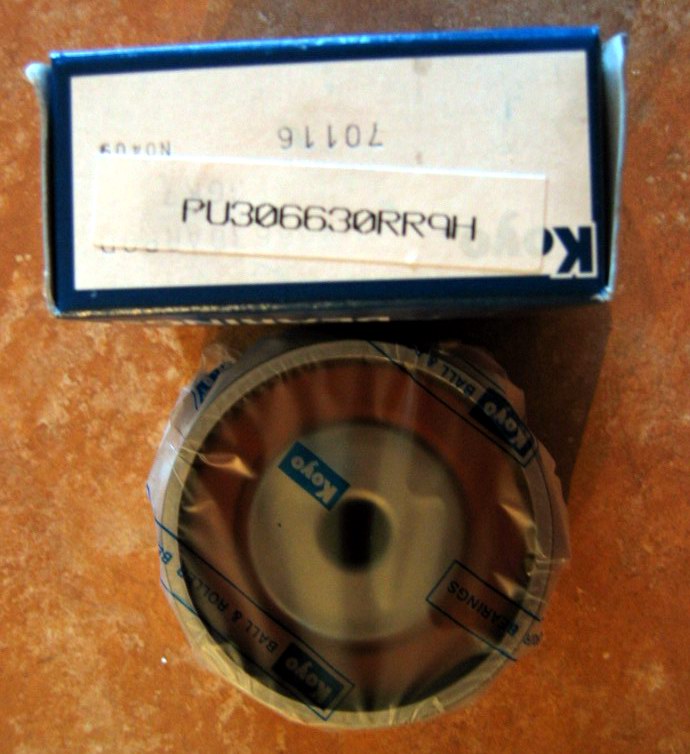
Cam Idler Bearing $129 (CBC bearings - just tell them it's a 1UZ-FE and
they do the rest)
Cam Tensioner Bearing $69
plus $20-$30 to change the serpentine belt bearings.
Budget around $650 Aud plus parts to get it done by a mechanic.
I took off the the battery side one piece plastic cover that goes over the plugs so I could see part of the belt. My old belt was shiny and had a few cracks:
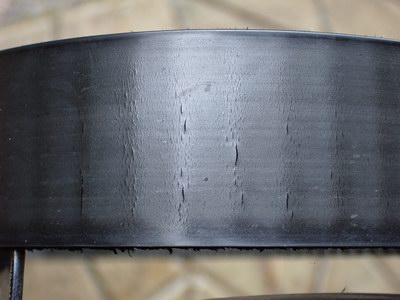
Time to replace the belt!
Compared to the new belt:

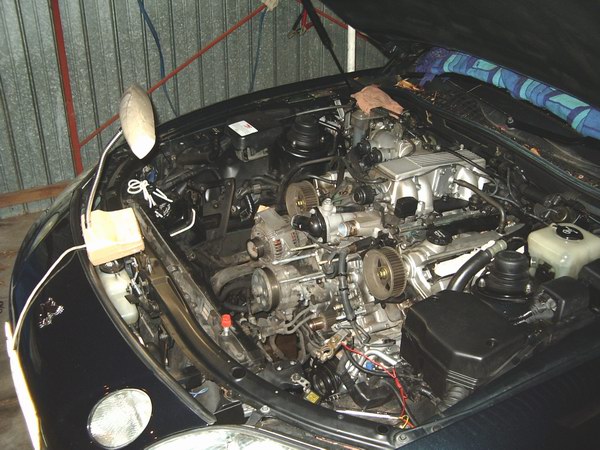
Since it was my first belt change I took the radiator out etc as outlined in the service
manual. I used the service manual available from Jeff Harper.
Bill Lewis in the UK has a guide available as well.
My distributor cap and rotors were worn and cracked - I got the BOSCH ones - again no
secret - just ask the BOSCH guys for the 1UZ-FE ones and it's easy.
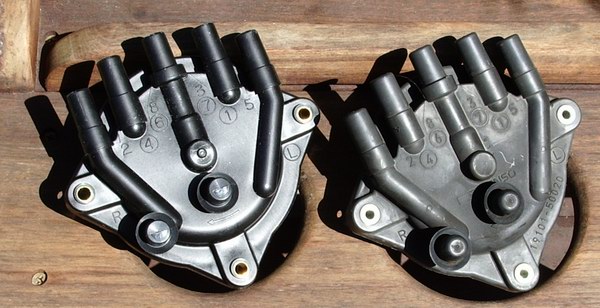
New Bosch on left, old Toyota on right.
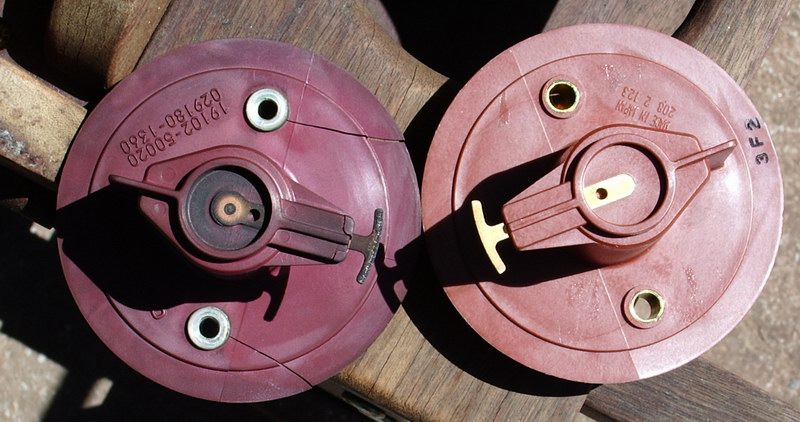
Old and new.
Old Cap- a little pitted, not much.
new
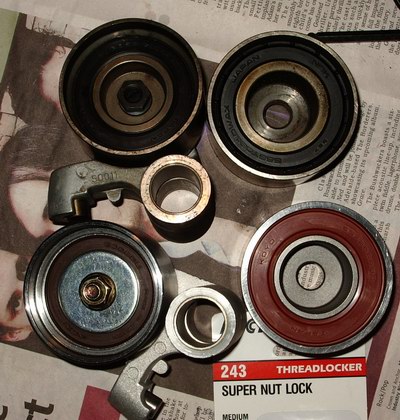
The tensioner bearing comes complete with the swivel arm - it's the expensive one of the two. I rang the day before and CBC delivered to my door!
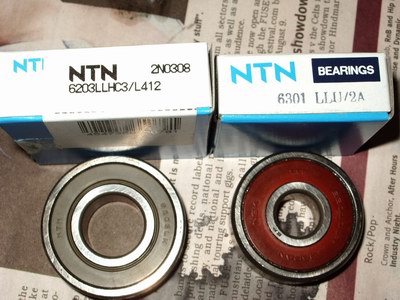
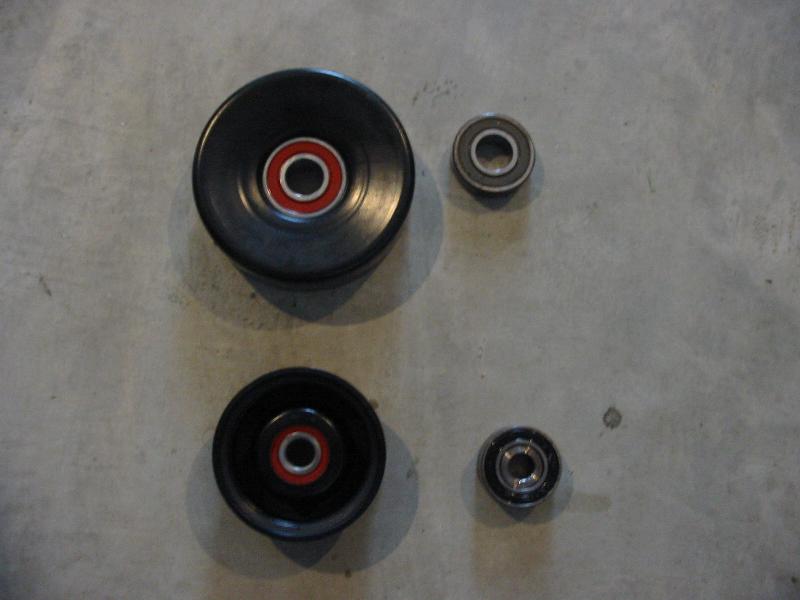
Typical serpentine belt bearings - I changed the whole lot - these are very cheap and I had no problems getting them from CBC. I took the bearings into CBC to get matched up. Then I used a piece of wood, and a socket, and a vice to press them out and in. The pulleys are soft and easily damaged.
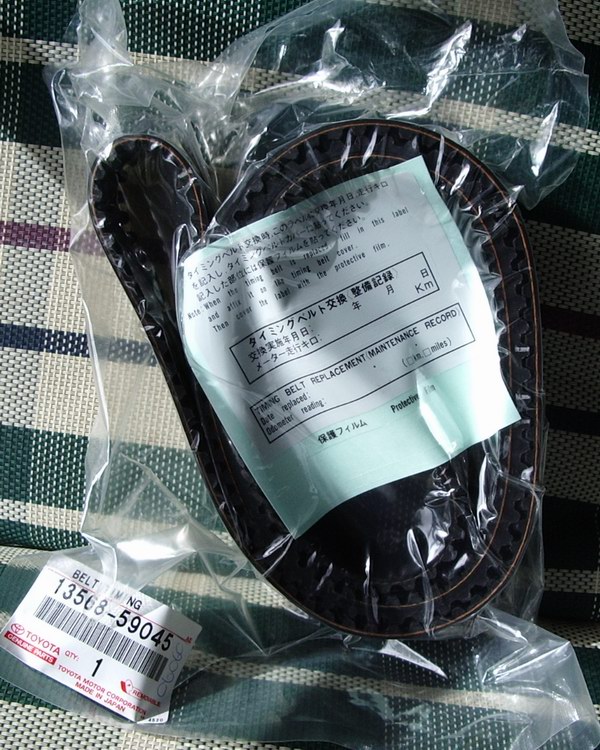
Aaaah - nice new belt from Toyota with fancy pants timing belt sticker and timing marks on the belt for cams and crankshaft - essential !!

I always look happy before starting a job. Notice there is no "during" photo.
That's 'cause when I'm grumpy, cold, tired with sore eyes and calling it quits at 2am I
don't feel like taking photos :)
1. Little things like putting this loom back in the right spot I found to be a bit of a
pain - I didn't pay enough attention pulling it apart.
2. The marks on the serpentine belt tensioner bearing indicate how stretched the
serpentine belt is - nothing to do with the Timing belt underneath.
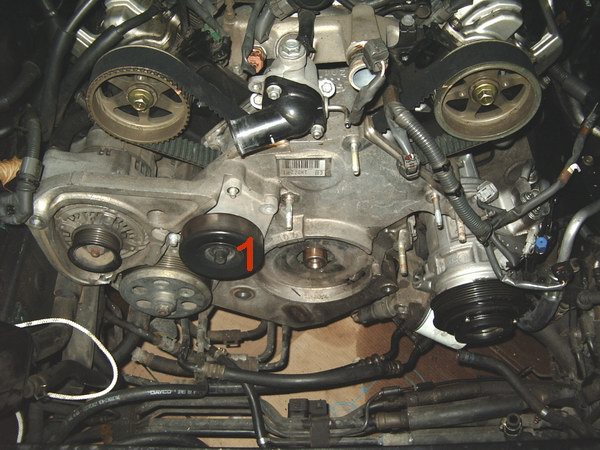
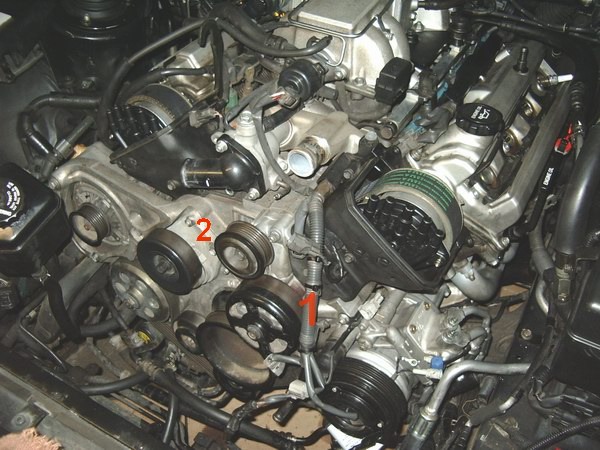
1. Tensioner for the Serpentine belt
Removing the harmonic balancer off the crankshaft needs special tools. I used a simple breaker bar on a socket - rested it against the empty battery tray area and used the starter motor to crack it off. Then I used a cheap Harmonic balancer puller to remove the harmonic balancer.

On the left is the UZZ32 balancer - the small pulley drives the suspension pump - the larger one is for the aircond and alternator. On the right is the more common "regular V8" harmonic balancer - big difference. Doesn't look like the 32 balancer will fit on a regular V8 to give an instant extra pulley to drive a supercharger for example.
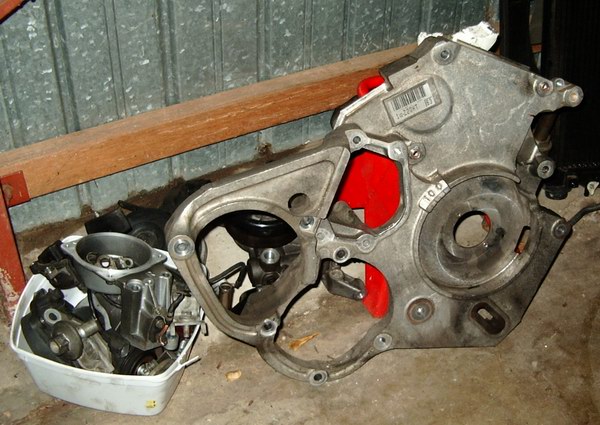
Check out the size of the UZZ32 timing belt cover - it dwarfs the regular V8 one. It also
supports the alternator, pump and aircond. - It's massive.
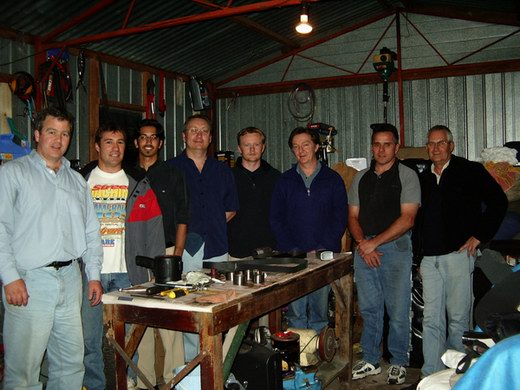
It was all in a million bits when the guys came over for a barby - me, Steve, Sanjay,
Gazza, Dan, Peter Nitschke, Craig and Peter Kerwin

Look at how impressed the guys are with my work so far! Gazza has his Clipsal 500
motorsport looking at grid girls face on.
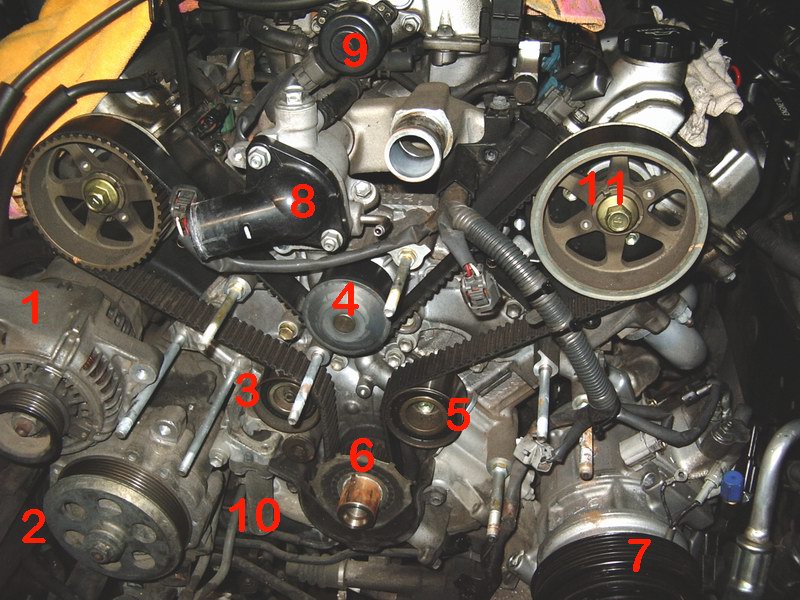
1. Alternator is mounted differently on the '32 - it is above the hydraulic pump
2. This is the big suspension pump and power steering pump - this is driven off a separate
belt to the other ancillaries
3. This is the Tensioner bearing - it pivots and keeps the belt tight. This is the
expensive bearing
4. Water pump is driven by the timing belt and hidden from view.
5. Idler bearing
6. Crankshaft pulley - at the front that disk with the teeth is the crankshaft sensor ring
thingy
7. New aircond pump - '32 pump sits further forward to clear the suspension pump belt.
8. New plastic Toyota thermostat cover - replaced as a serviceable item during radiator
top tank change.
9. Idle valve - when idling this valve controls air intake and the idle speed - often the
culprit for poor idling - they gum up and stick sometimes.
10. Tensioner - presses on the tensioner bearing to keep belt tight.
11. Exhaust cam sprocket. Not adjustable. Rotor bolts to this.
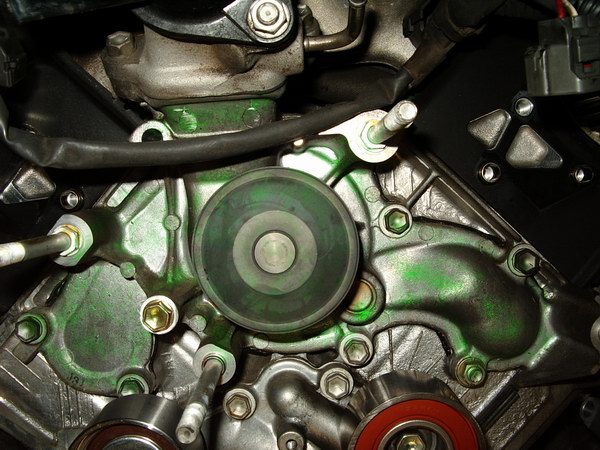
I have coloured in the water pump green. With regular correct coolant change this will
last and last and seals won't blow. Leaving the coolant too long or using "EL
Cheapo" brand coolant can make it age quickly. Since so much labour is involved to
get to it, and because it tends to last as long as the Timing belt, it is best to change
it at the same time. Pump doesn't come with a gasket. Use some gasket goo sealant stuff
from a tube sparingly. Toyota sell it (also used for the sump "gasket") or can
be bought generically from an autoparts store.
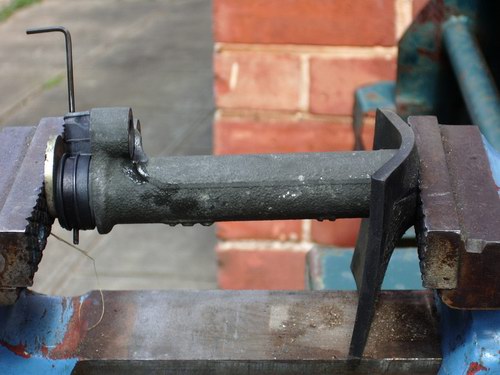
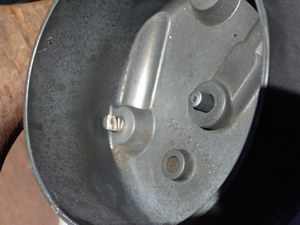
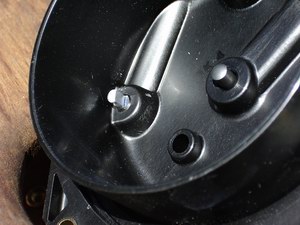
I slowly compressed the tensioner in a vice, inserted the allen
key to keep it that way until it was installed.
So after all that the car still feels exactly the same! No performance increase detectable. No surprises there - the car was running fun beforehand.
Jim Cox changed his Serpentine belt: Note these part numbers are for the UZZ31 and will not fit the UZZ32
I just changed my Serpentine Belt and Adjuster and Idler Pulley bearings on my V8,
so sharing the knowledge.
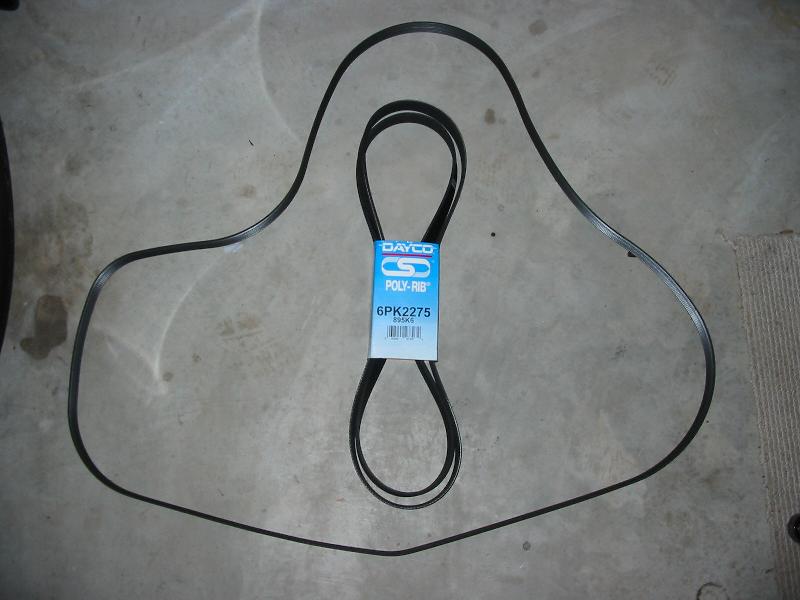
Serpentine Belt part number is 6PK2275 from Repco for $55 Trade
Bearing part number is 6203LLU/2A for Adjuster Pulley
Bearing part number is 6301LLU/2A for Idler Pulley.
These are available from CBC Bearing Company for $14.30 the pair Trade.
When I say Trade, usually when I go to Repco or any other company, I ask for the product
using the part number and then say Trade Price. Always works without any supporting
documentation. So try, as it will save you a bit of cash.
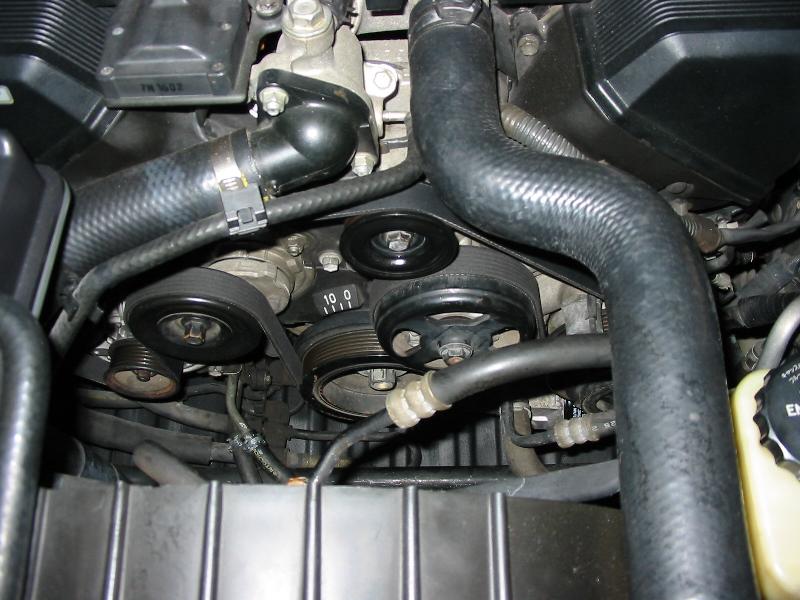
1. Draw a quick diagram of where the belt runs in relation to the pulleys.
2. Using a 14mm socket on a ratchet or breaker bar, put it on the nut on the pulley top
left of photo under the 2 hoses(small and big).
3. Lever anti-clockwise as it is spring loaded and remove the belt from the pulley.
4. Take the bolt out of the pulley by undoing clockwise as it is a left-hand thread.
Remove pulley.
5. Using same 14mm socket, put it on the top right pulley in photo and undo anti-clockwise
as it is a right-hand thread. Remove pulley.
6. Spray Penetrene on both sides of the bearing outers and let sit for half an hour.
7. Turn pulleys upside down. Only 2/3's of the bearing should be showing.
8. On a bit of carpet or folded rag on flat concrete, put the open end of a socket that
just fits on the rim on the bearing and wack with a hammer. Bearing will come out with a
few hits.
8. Clean surfaces on the pulleys where the bearing will be going and tap new bearing in
with a socket (flat ratchet end) that fits the outer rim of the bearing until it is seated
on the flange.
9. Reinstall pulleys in reverse of taking them off.
10. Reinstall new serpentine belt making sure all grooves in belt match grooves in
pulleys. Wrap belt around all pulleys making sure adjuster pulley is last for obvious
reasons.
Jim
Philip Ryrie suggested to:
...use 6301LLU/2A or 6301LLU/2A Bearings...You need at least C3 clearance in a hot environment like they work in, if you tell the bearing guys it's for an "Idler Pulley" they will give you the correct bearing, they have a part number many numbers long, I will find out what they are if you like, they have a high clearance and a high temperature grease along with better seals....( I am an ex CBC man )