
Written by Paul Irwin
My first imported car (and my current one for that matter) was a beautiful 1995 5-speed Soarer TT.
This car was my reward to myself for 4 years of engineering at university and managing to pass somehow with honours. Although at the end of the 4 years I feel like I know very little about Engineering the course was very demanding. I remember on the very first day of university the head of the faculty talked to us all. this is what he said and I remember it clear as mud.
"Welcome to engineering, I usually start this talk by saying... 'look at the person to your left... now look to the person on your right... 'statistically' only one of you will be here in 4 years time'. But I don't say that anymore because it scares the students" (bastard).
Anyway. The 2 people I was sitting with have actually deferred and also quit university. So the guy was right.
The only motivation I had was that when I graduate I can afford a nice car and say goodbye to the "Mighty Mira" (Holden JE Camira) that had served me so well throughout my education.
YEAH RIGHT

As you can see the old beast left a lot to be desired. but then came the Soarer, which has been the focus of my free hours ever since.
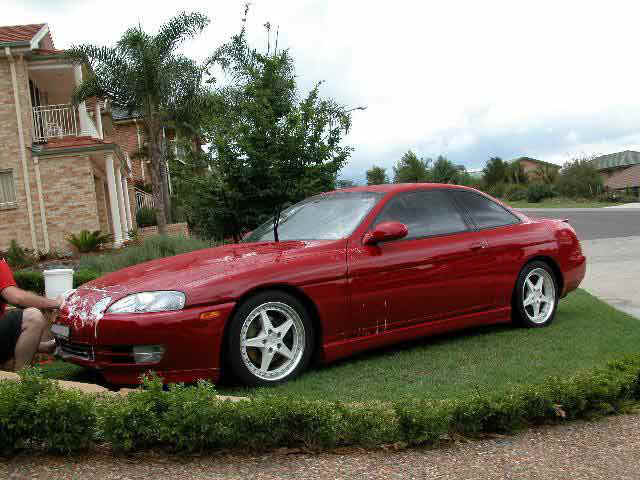
This car was beyond everything I had ever wanted in a car (except leather). I picked up the car from a guy in Coffs Harbour (about 7 hours north of Sydney) who even organised a night in a local resort for me when I picked up the car.
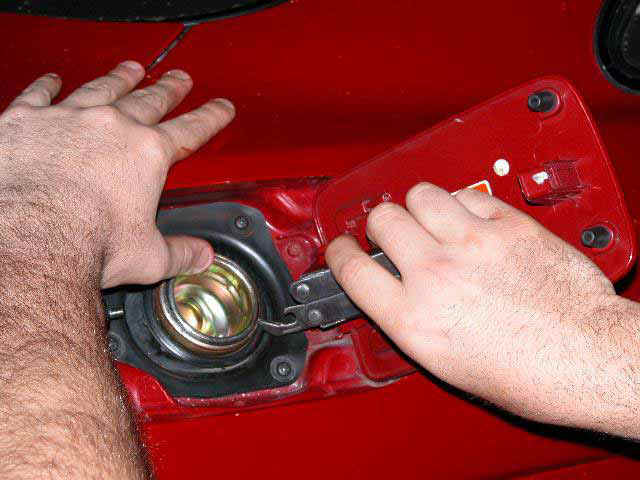
The next day the long (10 hour including stops) trip home began. And at the first stop for petrol I filled her up with Optimax. This fuel stop wasn't far from home and when we reached my girlfriends house to show it off to her mum the thing was leaking out fuel!!! Lots of it.
I was worried I had bought an almighty lemon or that my fuel cap was busted or I had an airlock or ... the list went on. A visit to the friendly ALSC (Australian Lexus Soarer Club) enlightened me to the real cause however and a host of helpful tips and pointers were followed by emails and further messages.
I felt that I owed it to the ALSC community to give back this knowledge as a helpful step by step guide (with a little crap humour) to help others when they encounter this allegedly common problem.
I must say before I go on that if you live close to the compliance company that did your car I hear that they are legally obliged to repair the restrictor at no cost as it means they have not successfully completed the compliance and it is quite dangerous. However my compliance company was in Brisbane and I live south of Sydney so it was never going to happen.
Also!!! Before trying this to fix your fuel nozzle leak, it may pay to check if you have the correct fuel cap for your car!!! It has come to my attention that some compliance companies actually install incorrect fuel caps, with threads that are too long and hence do not fully screw in and make a full seal. This will cause the nozzle to have the same symptoms as a leaking fuel nozzle restrictor. It can however be fixed by either buying the correct fuel cap or modifying your existing one. Worth a check before you go on with this fix.
Getting Off The Restrictor
Ok there were a few methods of pulling the restrictor out of the fuel nozzle. All of which involved a chisel or a screwdriver as the weapon of choice. The method of getting at it was what usually varied.
One person suggested that the entire fuel pipe is removed by "simply" undoing a few screws, and then the breather tube. But I decided to try without taking the whole thing out of the car.
I would have to say that if I did this again I would possibly pull the whole pipe out to ensure that nothing slid down the pipe during my removal of the restrictor.
Ok here we go!.
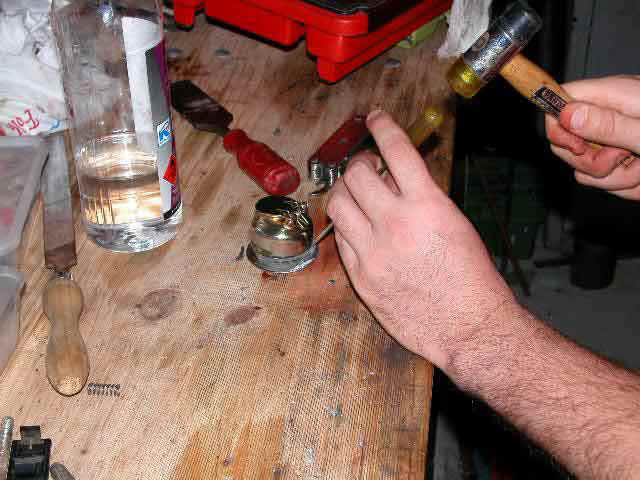
Step 1) Scrape away the filler that you can get at.
I used a trusty Leatherman can opener tool to scrape a nice groove in the filler/putty that holds the restrictor in. I scraped away until I could get no more filler out from under the lip.
self explanatory really isn't it.
Step 2) the smaller the better.
Once you have as much filler removed as possible try sliding a screwdriver up under the lip. if you don't have enough room to twist the screwdriver without gouging the nozzle then you will have to make the hole bigger. However once you can fit a screwdriver up there twist it lifting the nozzle gently up. To get the restrictor up I had to do this on 3 sides of the nozzle repeatedly. It might look like you're doing nothing but it will ever so slowly work its way up.
getting the screwdriver under the lip is the hard bit.
Yes it is already clean. I only thought of doing these 2 pics after I cleaned it up. : P
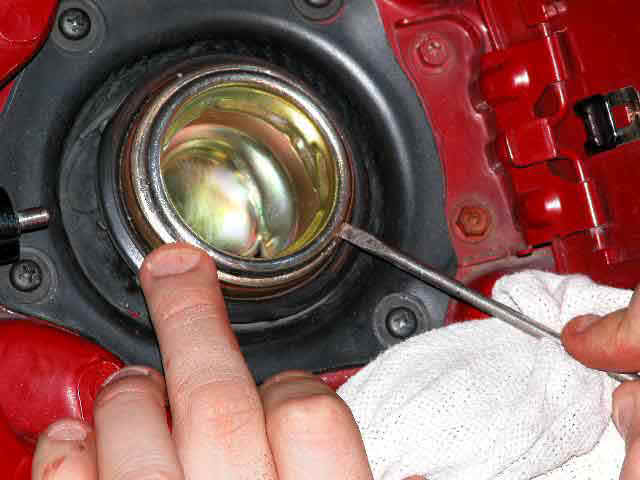
Step 3) Getting the gunk off.
The filler/adhesive is bloody strong stuff. The best way to get it off is to use a small screwdriver and a small hammer and chisel away the stuff.
slow and steady wins the race.
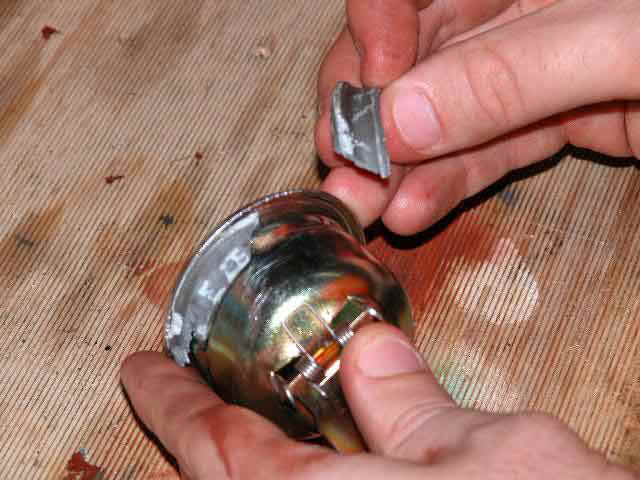
If you get the screwdriver on the right angle you can get a huge chunk off in one lucky blow (and no that's not blood on my hands and desk. It's that STAG stuff I was talking about earlier that stained my skin and the workshop bench)..
I think overall here the key is to just use little taps and a nice small screwdriver and it will just nick its way under the sealant allowing you to pry it off in a 'nug' like you can see above.
I found that hitting it harder didn't get me anywhere. Nor did a bigger hammer or screwdriver.
Just Don't!
Step 4) Cleaning.
Once that's done, clean out the restrictor with metho so its nice and clean and free from residue. Never use turps to clean unless you give it a once over with metho after the turps. The metho will dissolve the turpentine but will evaporate without a residue.
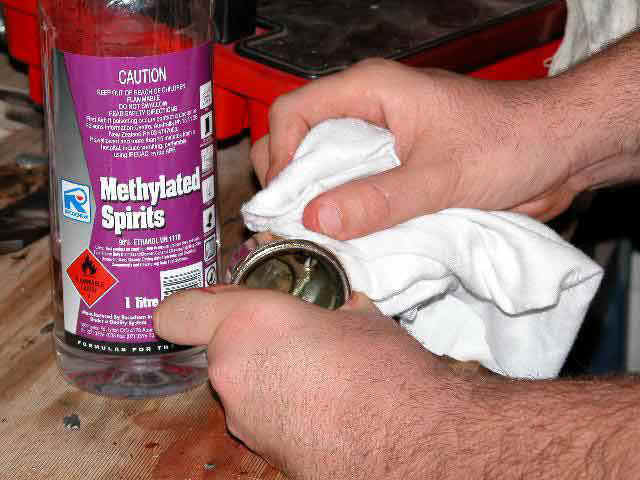
Also clean out the actual nozzle (however mine was spotless)
Clean all residue off with a Metho soaked rag.
Using all these spirits and thinners and also the close proximity to your petrol tank (how much closer can you really get). it would be important to point out the importance of a well ventilated workplace. All in all avoid inhaling the fumes as much as possible. Or you could black out or even get brain damage (so they say... I think).
Perhaps its time I did a confined space course...
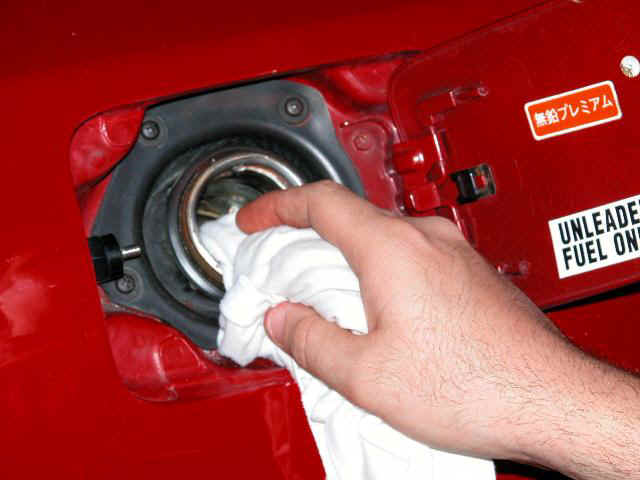
Also. try to keep anything from going in the tank that shouldn't be there, such as chunks of filler/sealant, cleaning agents, files and screwdrivers and ... err... well other fluids.

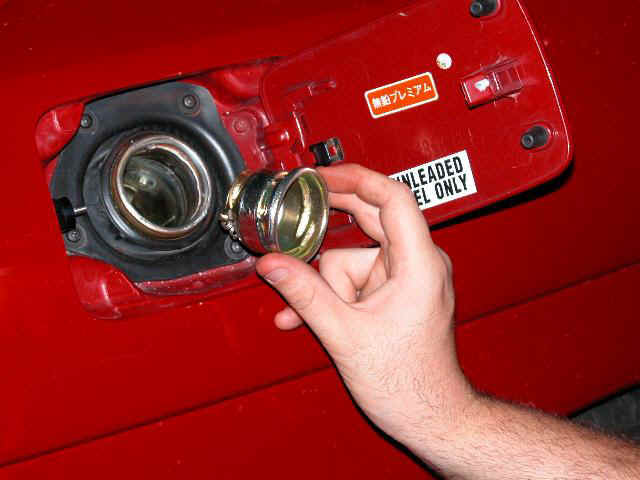
The sticker says "UNLEADED FUEL ONLY" for a reason.
Putting It Back In
Step 5) Re-fitting.
We now have the nozzle restrictor clean and also the nozzle itself clean. The next step is to get some sealant and put it back where it rightfully belongs.
I went to the auto shop and was told by the salesman to try some stuff called "STAG", I have but one thing to say about stag and its inability to go hard when its called to deliver the goods. SLOPPY.
I put this stuff on the first time round at 7pm and by 8pm the next day it was still as wet as when it came out of the tube. Seems that it needs contact with air and the salesman was wrong.
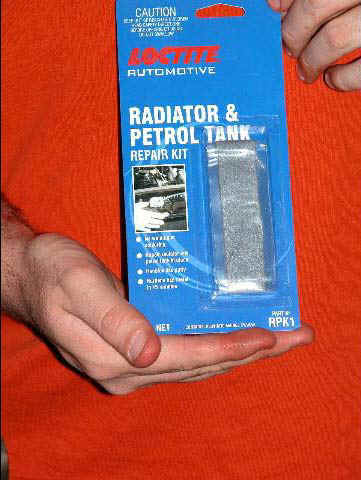
When you buy a sealant go for one that is PETROLEUM RESISTANT or whatever their marketing spin on that is. I ended up using a radiator and petrol tank repair putty. this stuff I can tell you now sets like a rock and is very easy to use.
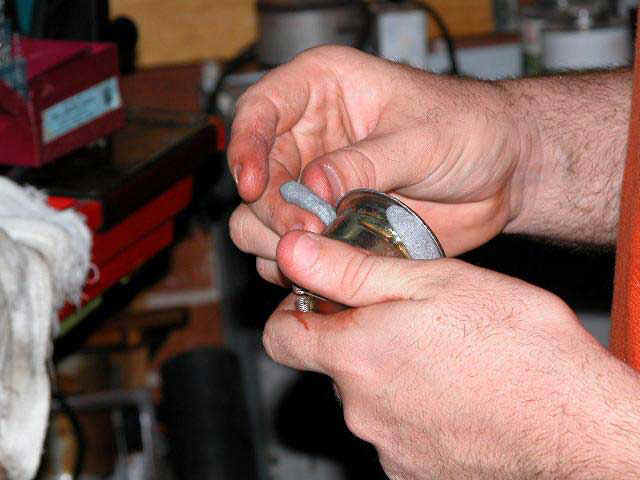
Take 1.
It's a 2 part epoxy and you knead it together with your fingers (unless you're some hypersensitive pedicure boy, who will have an allergic reaction) its got the consistency of blu-tac when mixed and you don't have long before the stuff sets (like under 2 minutes) the first time I used it I took my time and by the time I got to the nozzle to put it in... well ... lets just say I made another trip to the petrol station. The picture below doesn't do it justice, the stuff went hard as a rock!

and..... Take 2. (with effort 1 on the left)
Once kneaded quickly roll in the palms into a long sausage that will fit around the restrictor lip.
and then RUN LIKE BUGGERY to the petrol tank and press it in. Cutting off the excess to make it just like it was when you started... minus the leak of course...

Good ol' Leatherman tool.
Step 6) Rest and be happy.

Now I just need to suck the flakes of old sealant away.
Conclusion.
Ok well I hope that helped a little. Its just good to see what you're doing. I didn't do anything that I wasn't advised to do by others in the ALSC so the information definitely isn't new. But its visual and that always clarifies a lot.
Overall I would recommend that if unless your compliance company is close by, do this yourself. It's pretty simple and you're learning along the way all whilst spending more time with your precious import.
CYA on the road.