

 Table 1 Converting thousandths
of an inch (thou) to mm
Table 1 Converting thousandths
of an inch (thou) to mm
Thousandths of an inch (thou) |
mm |
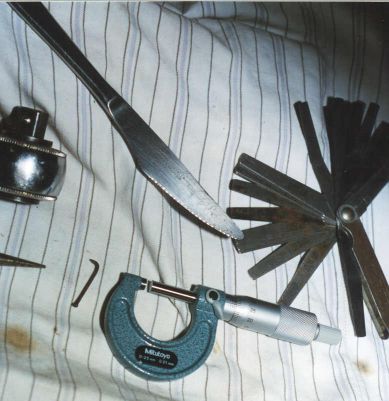
My feeler gauge is in thousandths
of an inch - nothing wrong with that, but the Toyota parts are in mm so sooner or later I would have to convert from one to the other. |
1 |
.025 |
|
2 |
.051 |
|
4 |
.102 |
|
5 |
.127 |
|
6 |
.152 |
|
7 |
.178 |
|
8 |
.203 |
|
9 |
.229 |
|
10 |
.254 |
|
11 |
.279 |
|
12 |
.305 |
|
13 |
.330 |
|
14 |
.356 |
|
15 |
.381 |
Since I don't have a workshop manual I needed the cold valve clearances. Usually they are around 10 thou intake and 12 thou exhaust. Steve Janda from StarTrade gave me the correct clearances (see table below) so for this V8 I'll aim for 8 thou and 12 thou.
Table 2 1UZ-FE cold valve clearance specifications
Lobe height |
Clearance to shim |
|||
standard |
minimum |
|||
mm |
mm |
mm |
Thou. |
|
Intake |
41.71 – 41.81 |
41.56 |
0.15 – 0.25 |
6 – 10 |
Exhaust |
41.91 – 42.01 |
41.76 |
0.25 – 0.35 |
10 - 14 |
The exhaust valves have a larger cold clearance because they glow red hot and expand during engine operation - intake valves stay cool with petrol and air continually washing over them.
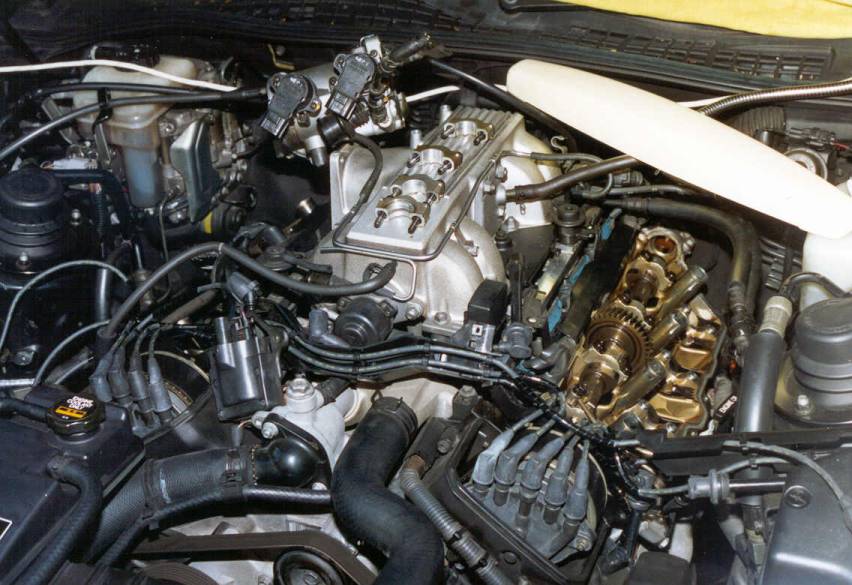
The 1UZ-FE V8 is a delight to work on - Of all the engines I have worked on and rebuilt (Merc, Volvo, BMW, Holden, Ford, Suzuki, Honda, Kawasaki) this is the nicest - very well made - oozes quality with every nut, bolt and fitting. Under the cam cover it's spotless, the split helical drive on the exhaust cam is a work of art. The shim and bucket valve adjustment wouldn't be out of place in a 11 000 rpm motorcycle engine - boy is it good!
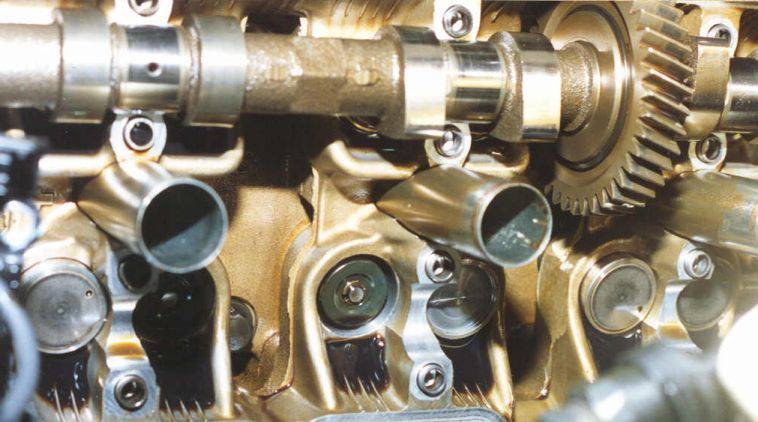 |
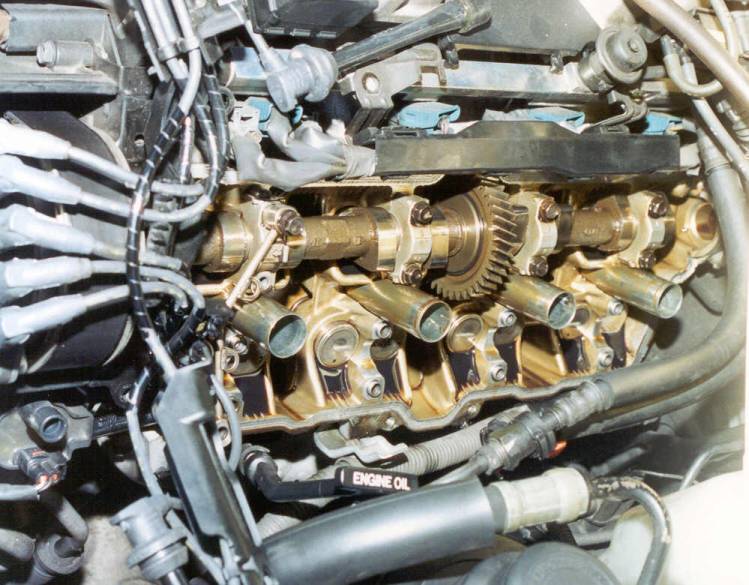
In this photo you can see the top of the valve, a bucket with no shim in it and buckets with shims in. |
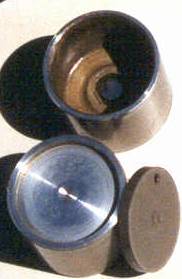 |
The underside of the bucket rests on the valve stem, the shim next to the bucket rests on top of the bucket. |
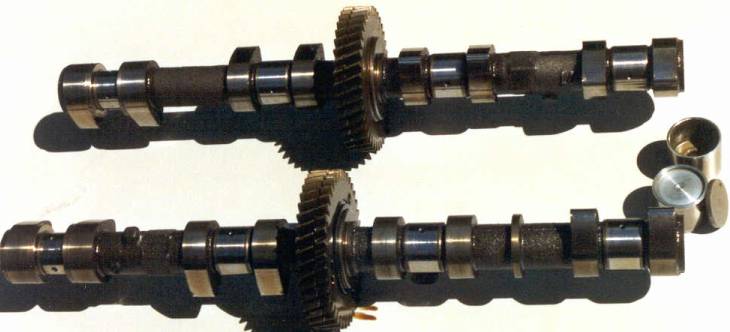 |
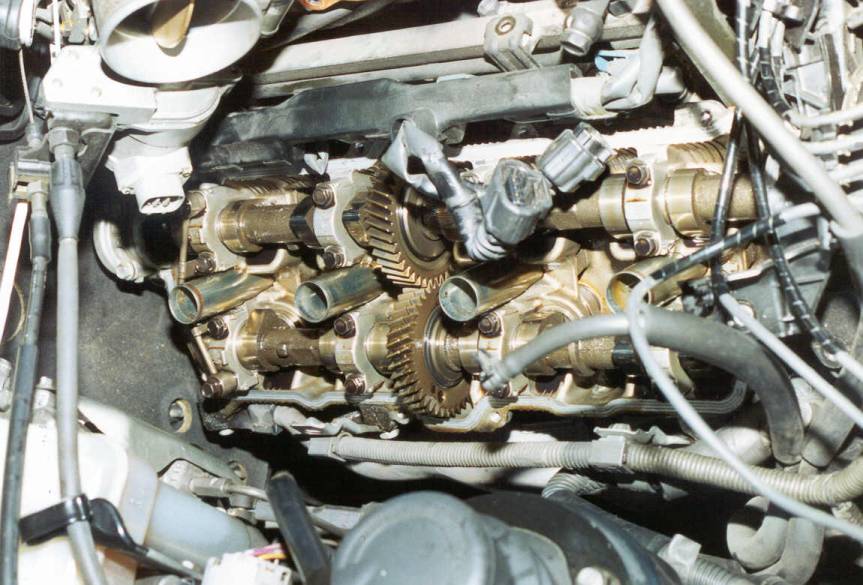
The cams just out. |
 |
The exhaust cam on the battery side is the easiest to get out. I can think of any motor where the exhaust cams are easier to get out than this one. |
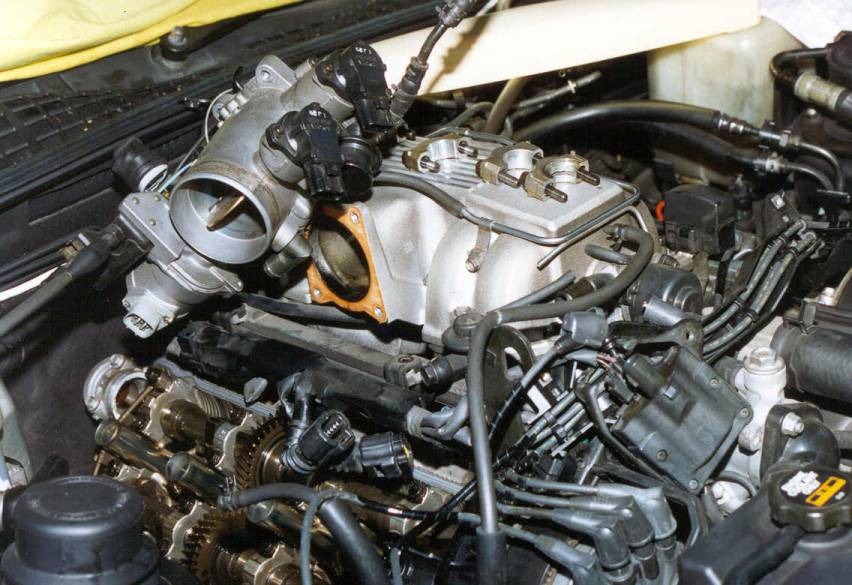 |
The intake side it a bit more involved. I removed the throttle body studs to to get at the cam cover ventilation tube (goes into the bottom of the throttle) |
 |
Intake cam is belt driven (harder to remove), exhaust cam is gear driven off the intake cam - easy to remove - has to be put back exactly (marks on gears) otherwise real bad things happen. |
 |
Not a lot of room - but if you're not in a rush it happens smoothly |
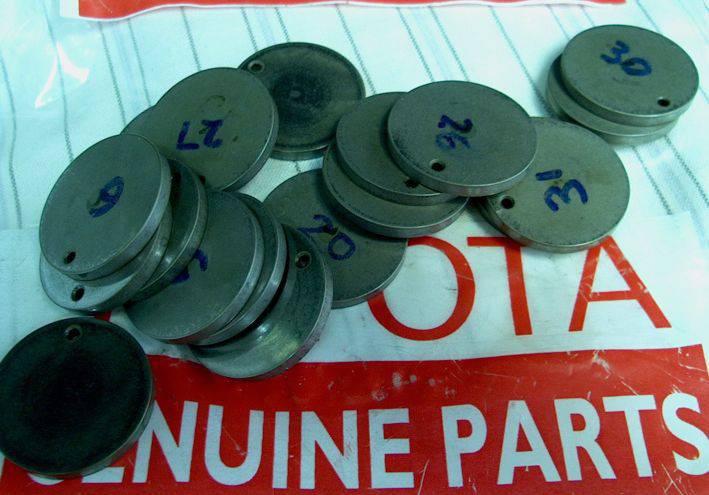 |
Numbered shims measured - most of these are now useless with the new cam - they are all too thin. |
 |
They all look the same but are all so different - can't pick it with the naked eye. The thickness of two sheets of paper make a big difference. |
The cam covers and throttle body were removed easily - before taking out the exhaust cam I measured the cold clearances:
![]()
I have numbered the cylinders from #1 to #8 and each valve from 1 to 32. The large numbers inside the circles are the clearances in thousandths of an inch. The red numbers are the ones that are out of range - or too big (a sheet of paper is 0.09 mm thick, three sheets of paper is 1 thou approx - new shims vary in thickness by half a sheet of paper thickness). Valve numbers 22-24 are probably the ones causing the ticking noise or tapping noise. Because I wanted all the intake valve clearances to be exactly the same, I'll have to change 20, 22, 23 and 24. I want 8 thou clearance for all of them. Previously because the valve clearance for 23 and 24 were larger than the rest - they would open later than the other valves and shut sooner - less fuel and air would get in - how much difference would this make? - I'll never know. If I went and did a dyno now I would know - but I was committed to getting the exhaust cams out and modified so the effect will be hidden under the effect of the exhaust cam mod.
Once I knew the clearance it was time to measure the thickness of all the exhaust valve shims and the four selected intake shims. Having no factory tools I tried a few things to get the shims out of the buckets. The buckets slide out easily enough and then getting the shim out is no problem. But I didn't want to remove the intake cams if I could help it - they are driven by the cambelt and removing all that .. - aahhh, I wanted to avoid that. So I used a bent nail to hook into the little hole on the edge of the shim and a butter knife to hold the bucket down so I could pluck it out . Luckily the intake shims I wanted were away from the belt end - I could loosen the intake cam and it would come up enough for me to remove the shims without removing it properly. There may be a special tool to press down the bucket and valve so you can get the shim - It would be some clever tool - there isn't much room there. I numbered all the shims as I took them out with a marker pen so I wouldn't mix them up and threaded them onto a piece of wire. I used a 0-25mm micrometer, Mitutoyo of course, accurate to 0.01mm. Don't bother using a sliding vernier type - not accurate enough. Here are the shim thicknesses:
![]()
Notice a couple of times the measured thickness was between 0.01-0.02, so I put it down as 0.005mm. It's real easy to use and read a micrometer wrong. I've seen all the wrong ways in a Structural Analysis Pracs I used to take. Biggest thing that goes wrong is that the thimble only reads from 0-45 - you have to know whether it is less than or greater than 0.5 from the sleeve scale. Next would be doing it up too tight rather than using the ratchet stop 1.5 to 2 times to exert a constant measuring force. Ohh, zeroing too.
Now that I knew how thick the shims were, I could search for a suitable exhaust shim to slot into the four intake spots. I figured that most if not all of the exhaust shims were about to be obsolete with the new cams so might as well use them. So consider the four intake shims that had a too big a clearance (the shims were too thin). I could now calculate how thick I wanted the new shims to be to get the clearance to 8 thou like all the others. Now it gets a bit tricky because I am measuring clearance in thou (just like Dad does) and new shims are in mm. So here is the table in thou and mm.
Table 3 Calculating new shim thickness
Shim # |
Thickness (mm) |
Clearance (thou, (mm)) |
Desired clearance (thou, mm) |
Increase shim by |
Desired shim (mm) |
New part thickness |
New clearance |
20 |
2.855 |
9, (0.229) |
8, (0.203) |
1, (0.025) |
2.88 |
2.875 |
8,(0.209) |
22 |
2.87 |
10, (0.254) |
8, (0.203) |
2, (0.051) |
2.921 |
2.925 |
<8,(0.199) |
23 |
2.895 |
12, (0.305) |
8, (0.203) |
4, (0.102) |
2.997 |
3.00 |
<8,(0.2) |
24 |
2.91 |
13, (0.330) |
8, (0.203) |
5, (0.127) |
3.037 |
3.05 |
<8,(0.19) |
Now that I know how thick the shim should be, I can look through the exhaust shims to see if anything comes close.
Table 4 Substituting nearest exhaust shim
Shim # ,(mm) |
Sub with # |
New clearance theory |
comment |
Buying new shims (mm) |
New clearance |
20, (2.855) |
3, (2.87) |
8, (0.214) |
ok |
|
8 |
22, (2.87) |
4, (2.93) |
<8, (0.194) |
Bit tight |
|
8 |
23, (2.895) |
1, (2.96) |
9, (0.24) |
Bit loose |
3.00 |
8 |
24, (2.91) |
n/a |
n/a |
n/a |
3.05 |
8 |
I tried three of them - two were fine, the third was still too loose. So I went and bought two new ones for $12.80 each. I checked over the phone first - they got one from Perth and one from Melbourne, both there overnight. Got them from CMI Toyota in Adelaide. I gave the exact part number I wanted - saves a lot of time. Used the fabulous Parts CD again. Here are the part numbers for all the shims you can get:
Table 5 1UZ-FE shim part numbers
Part number |
Thickness (mm) |
13753 - 50010 |
2.50 |
13753 - 50060 |
2.60 |
13753 - 50130 |
2.70 |
13750 – 50180 |
2.75 |
13750 – 50230 |
2.80 |
13750 - 50280 |
2.85 |
13753 – 50330 |
2.90 |
13753 – 50380 |
2.95 |
13753 – 50430 |
3.00 |
13753 - 50480 |
3.05 |
13753 – 50510 |
3.10 |
13753 – 50560 |
3.20 |
13753 – 50610 |
3.30 |
13573 – 50620 |
2.525 |
13753 - 50630 |
2.55 |
13753 – 50640 |
2.575 |
13753 – 50650 |
2.625 |
13753 – 50660 |
2.65 |
13753 – 50670 |
2.675 |
13753 – 50680 |
2.725 |
13753 – 50690 |
2.775 |
13753 – 50700 |
2.825 |
13753 – 50710 |
2.875 |
13753 – 50720 |
2.925 |
13753 – 50730 |
2.975 |
13753 – 50740 |
3.025 |
13753 – 50750 |
3.075 |
13753 – 50760 |
3.125 |
13753 – 50770 |
3.15 |
13753 – 50780 |
3.175 |
13753 – 50790 |
3.225 |
13753 – 50800 |
3.25 |
13753 - 50810 |
3.275 |
I had to buy shims for 23 and 24, I needed 3.00 mm and 3.05 mm. This is part numbers 13753-50430 and 13753-50480. The shims come with little black numbers on one side, 43 and 48 - so you can't mix them up. You could just see evidence of the old part numbers on the underside of the old shims. There was also old handwritten numbers on the shims as well (1-32)- someone else had also numbered the shims at some stage don't know when, was it at the factory or since then?
![]()
Using exhaust shims 3 and 4 for intake valves 20 and 22 worked just fine. Exhaust shim 1 was not quite thick enough for intake 23 and nothing was thick enough for intake 24, that's why I had to get two new shims. The cam lobes are ground such that the the shims rotate. New shims are dull grey, old ones are polished on the lobe side and you can see circular wear marks.
My cams should be ready Friday, Monday morning at the latest - then they get posted
back say Wednesday, fit them and measure clearance Thursday, buy shims Friday or Saturday,
refit Saturday, drive Saturday night? ![]()
